Last week I made a beginners tutorial on the Cage Transform tool in Gimp 2.8. I got some acceptable results using Cage Transform on a clipart image but wasn’t happy with the blurriness using the tool created and really didn’t completely understand how to use it. After using it for awhile longer and viewing several other tutorials, I decided to try to use the Cage Transform tool on a photograph. The image clarity was better this time around and I also found how to fine tune the cage points after it’s already in place. Here are the main two points I missed last week when checking out the Cage Transform tool.
#1 Adjusting Cage Points
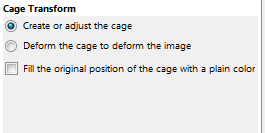
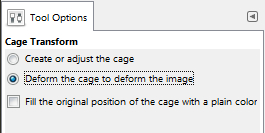
When you select the Cage Transform tool from the toolbox you will see these options in the Tool Options window.
After selecting your points and outlining your image (covered previously) you will see the Deform the cage to deform the image option automatically selected in the Tool Options window. Clicking back on the Create or adjust the cage option will allow you to go back, edit your cage points, and fine tune the outline of your image.
This helped me create much nicer outlines of the images I wanted to deform.
#2 Touching Up Your Results
The second tip I wanted to pass along was touching up your results. A tutorial at LittleWebHut.com pointed me to an excellent technique for touching up my Cage Transformed images.
The basics here are create a duplicate of your image when you start your project by clicking on your image layer and selecting Duplicate Layer. After you’ve deformed the image on the top top layer right click on the top layer and select Add Alpha Channel. Next use the eraser tool to erase an blurriness or unwanted distortion around the image.
Watch the video at the top for a step by step explanation of this.
What tips do you have for using the Cage Transform tool?


{ 1 comment }
Nice article! I just upgraded to Fedora 17 with Gimp 2.8, so I’m still getting used to the new Gimp. I’m looking forward to trying the cage tool myself.