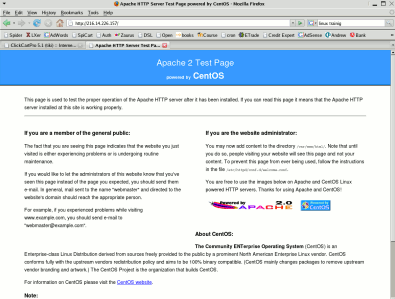
Apache is based on the code developed by the National Center for Supercomputing Applications (NCSA) and has developed into the most secure and stable web server today. In fact, Apache has the major share of Internet web sites. NCSA’s active development stopped in late 1994 and a group of web administrators coordinated to create their resources into one single code tree and formed the Apache server in 1995.
Server features that stand out for Apache are it’s speed, configuration options , stability and feature set. Apache is known for rock solid stability that comes from a source code that has been available for a long time and many have reviewed it. Also the wide usage has helped to facilitate bug fixes quickly. Many businesses either train web developers themselves or pursue Linux Training in order to keep their sites on Apache.
Apache Install on CentOS
Use yum to install Apache.
yum install httpd
Like all daemons on the server httpd can be managed with the service command.
service httpd start
service httpd stop
service httpd reload
Use chkconfig to set up httpd so that it will load when the server starts.
chkconfig – -level 35 httpd on
The main configuration directory is /etc/httpd. In that directory, as you see listed below, are several important files to Apache. In the conf directory is the main Apache configuration file called httpd.conf. The conf.d directory contains any applications that would normally want to modify the httpd.conf. This provides better integrity for the httpd.conf file by keeping those changes in a separate directory for better management. The main httpd server is located in /usr/sbin/httpd.
/etc/httpd/
conf conf.d logs modules run
It is worth the time to review the httpd.conf file as you will learn a great deal as well as become familiar with necessary options that you will likely use. The httpd.conf file is broken into three sections.
Section 1: Global Environment
The directives in this section affect the overall operation of Apache, such as the number of concurrent requests it can handle or where it can find its configuration files.
Section 2: Main Server Configuration
The directives in this section set up the values used by the ‘main’ server, which responds to any requests that aren’t handled by a <VirtualHost> definition.
Section 3: Virtual Hosts
VirtualHost: If you want to maintain multiple domains/hostnames on your machine you can setup VirtualHost containers for them.
The conf.d directory allows you to place configurations from programs that need to modify Apache in order to run. Often a program will be loaded on the server and it will need to make modifications to the /etc/httpd/conf/httpd.conf file. Instead of making modifications directly, programs make the desired modifications and place them in the /etc/httpd/conf.d directory. This keeps programs from altering the main config file. The line that supports this in the httpd.conf file is:
include conf.d/*.conf
Any files with a .conf extension will be read by Apache in alphabetical order when placed in this directory.
Warning!…if you are using SELinux you will want to be sure that you place your web content in /var/www/html as that is the default location that will be allowed by SELinux. If you are interested in making modifications to SELinux see the Apache with SELinux page.
Create a Test Page
Move into the /var/www/html directory.
cd /var/www/html
Follow the instructions below to use vi to create an index.html page.
vi index.html
Select “i” for insert mode so you can create text.
Now enter this text:
<HTML>
<HEAD> </HEAD>
<BODY>
<center>THIS IS MY NEW WEB PAGE</center>
</BODY>
</HTML>
Select ESC to quit insert mode. Now save the document with:
: wq!
Now refresh your browser to view the new page. What happens?
Change Permissions
apache must be the owner of all html documents to be accessed from the Internet. Change the permissions on your index.html:
chown apache:apache index.html
Now refresh your browser point it to your IP Address and it should work.
This is the first of many Apache Web Server tutorials we’ll be rolling out in the next few days. We want to get your input on future tutorials and web server training classes. Please comment below.

