GIMP – GNU Image Manipulation Program – has long been recognised as the premier Free Software package of its type. If you want to do serious work with photographs and you don’t want to pay anything (or you like your software free and open) GIMP is the first place to come.
Now on version 2.8, GIMP’s been around since 1996, having started as a college project. You can tell it’s free – no marketing department, regardless of how much white powder they’d enjoyed, would ever have thought that was a good name, but the humorous acronym stuck.
GIMP works across a range of platforms: Linux, Windows, Mac OS X, OpenSolaris and FreeBSD. You can download it from www.gimp.org or install it directly from the software repository on your Linux distro.
Starting up GIMP, the first thing you’ll notice is the multiple windows. You’ll see the main window and a toolbox window, almost certainly in different parts of the screen. Some people love it, many others hate it – especially when a window goes missing in action and you find yourself having to hunt around a busy desktop just to uncover it. Luckily, GIMP now comes with a single window option. From the pull-down menu select Windows > Single Window Mode.
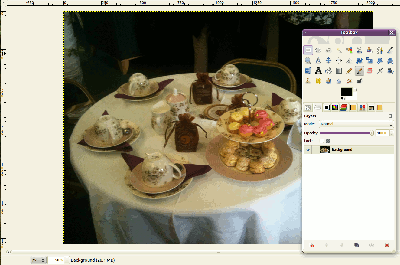
We’ll open a photo with File > Open; though if you want to directly grab a scanned image or screenshot you can do that with File > Create.
Here are a few of the simple tasks you might want to perform on an image:
Crop: Click on the crop tool in the toolbox (the icon that looks like the business end of a craft knife). Select the area you want to crop, and hit Enter.
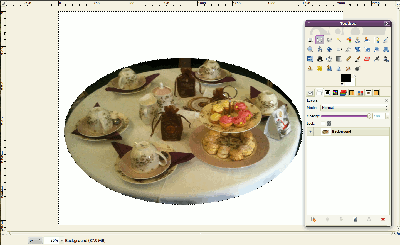
Circular frame: Select the Ellipse select tool in the toolbox and draw an ellipse around the area you want to keep, adjusting as needed. Now from the pull-down menu choose Select > Invert. You’ve now selected everything outside the ellipse. Hit the Del key or click on Edit > Clear and everything outside your selection will vanish.
Transparent backgrounds: Following from the example above, you’ve created an ellipse with a white background around it. Here’s how you make that white background transparent.
1.From the pull-down menu select Image > Mode and change the mode to RGB, if it isn’t already.
2. Select the area of your graphic that you want to be transparent. There are many ways to select areas in GIMP. If the area you want to be transparent is already all one color, and that color doesn’t appear elsewhere, you can use Select > By Color. At the other extreme the freehand select tool gives you the ability to choose exactly the right region – but it can take a while. Another handy option is Select > None which doesn’t change your image but removes any selections.
3. If the area you’ve selected isn’t all one color, delete what’s there (Edit > Clear or just hit the Del key).
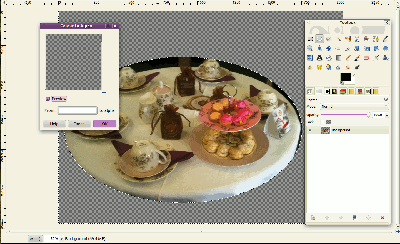
4. From the pull-down menu, select Colors > Color to Alpha and the default should now make your selected region transparent (represented by the squared gray background).
Black and white: There are many different ways in GIMP to make your image black & white. One of the simplest is to select Colors > Colorify and accept the defaults.
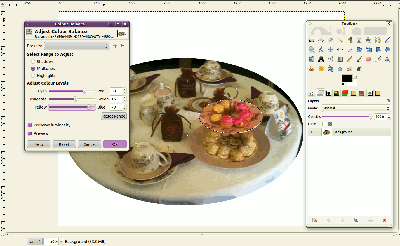
Light & color settings: Under the Colors pull-down menu you’ll find a series of options to make the fairly standard changes to your image. Color balance, brightness, saturation and contrast can all be fine-tuned. Remember you can apply any change to just a section of your image if you select the area first.
Special effects: Want to apply some effects to your image, perhaps transforming it into a cubist work of art, or adding a coffee stain or old photo effect? Under the Filters menu you’ll find more options than you can imagine. If even they aren’t enough, you can create your own effects and short-cuts with Script-fu – though that’s pretty advanced.
Layers: Any advanced use of GIMP requires you to get your head around layers. Imagine (if you’re old enough to remember) ta pile of overhead projector transparencies – see-through plastic sheets. On each one you might have a different part of the image – stack them in the right order and you can see the whole image. Layers make it much easier to work on one part of your graphic, and to move elements around, or delete or hide them, without affecting everything else.
Saving your file: GIMP’s native file format is xcf. From version 2.8, GIMP will save your file in this format by default, which is handy if you want to edit it in future and less so for sending it to your mates or putting it on a website. To save your file as a gif, jpg, png or some other format, use File > Export. Be a little careful as not all formats support all the features. For example, jpg doesn’t support transparency.
GIMP vs Photoshop
If you’re a professional, the chances are you use Adobe Photoshop or something similar for your image manipulation – it’s so successful that the name’s long since been verbed, with “photoshop” becoming a synonym for any computer graphical manipulation.
There are those who will try to persuade you that GIMP is as good. It isn’t. Sorry, but facts are facts. Photoshop has a number of high-end features like the ability to handle 16 and 32 bit images natively and CMYK color separation that are important at the high end and GIMP simply doesn’t match. Photoshop also has superb support. GIMP is good, but it can’t match the sheer number of courses, books and websites devoted to its rival.
But, as ever, the package you pick depends on your needs. If you’re running Linux, don’t want to pay out hundreds of dollars or are one of the 90% of users for whom GIMP does everything you need, then it may well be the right application for you.
GIMP vs the basic packages
GIMP, as the name tells you, is for image manipulation. It isn’t a drawing package and it’s not very good at that. If you want to draw, use a specialist tool like Inkscape or – for simple projects – LibreOffice Draw.
If all you want to do is crop a photo or two, GIMP will do the job just fine but there is no shortage of much simpler (and also free) options both on the web and installable as Linux applications. They do the job well, especially if they’ve been designed with your specific task in mind.
Where GIMP really shines is that middle ground. If your needs aren’t at the professional level, but you want something that goes beyond the standard photo tweaks and you’re willing to put a bit of time into learning it, you’ll find GIMP is hard to beat.


