Scribus is a mature, multi-platform Desktop Publishing (DTP) application. The Scribus team are keen to say that it’s used by amateurs and professionals alike and, since its launch in 2003, Scribus has established itself as the premier Free and Open Source DTP package.
Desktop Publishing software is aimed at producing magazines, leaflets, handouts, newspapers – anything where layout and good print quality are critical (though all DTP software will produce PDFs too).
Where DTP tends to score over Word Processors is the ease with which different elements – headlines, body text, graphics and shapes – can be independently placed, manipulated and altered to get the exact finish you’re looking for.
First steps
On starting up Scribus and creating a new document (you can accept the defaults for now), you’ll see the main interface is pretty busy.
The first thing to do is hit F2 or select Windows > Properties to bring up the Properties dialog: without this in front of you, you’ll find yourself fumbling around to achieve even the simplest tasks.
Background color
We’re going to color the background of our leaflet.
Look to the bottom left of the Window and you’ll see the zoom at 100%. Take that down to about 40% so you can see the whole page on the screen.
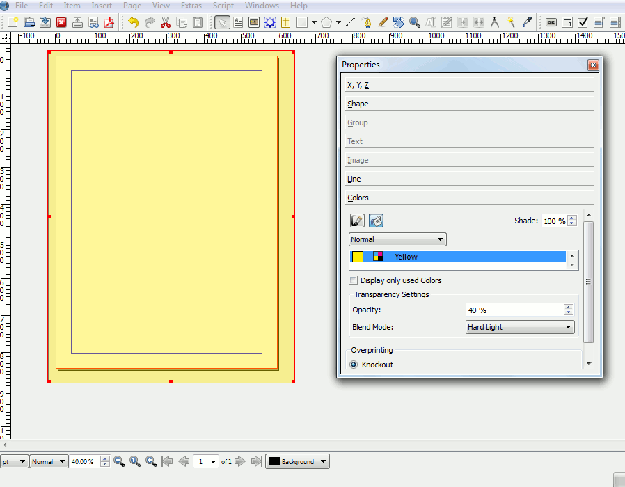
Look along the button bar along the top of the screen. Just under half way along you’ll see a square “Insert Shape” button. If you click on the arrow next to it, you’ll see there are lots of different default shapes you can insert, but we just want the basic square. Click on it and then, holding down the left mouse button to drag, create a rectangle that goes outside the borders of the page. (If you were getting something professionally printed, this would ensure you design would go right to the edge of the page and not have a white border around it).
Your rectangle should be highlighted – with a red outline and eight small square dots on the sides and corners.
On the Properties window you opened before, click on the Colors button. There are a whole host of coloring options under here (which you can apply to any object). You can make the square one solid color, add transparency or have the colors blend across a gradient.
Headline
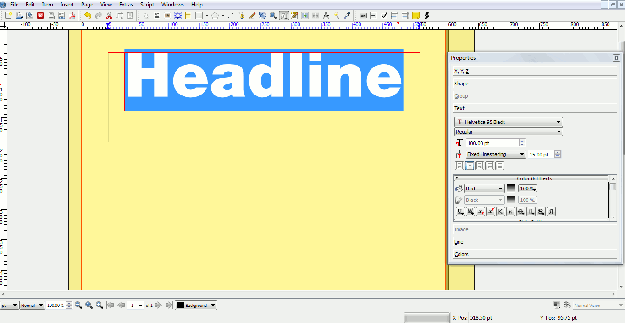
From the top row of buttons, click on the “Insert Text” button and draw a headline-sized box across the top of the page.
Double-click in the box and type your headline. Now highlight the text and click the Text button on the Properties window. Under here you’ll see every option you can think of for changing the text. You’ll want to change the font and size – experimenting until you get to the right size. You can also change the color – this is on the Colors & Effects section under Text, not under the Color section (which will change the color for the whole frame).
Unfortunately, Scribus does not have a feature that’s been standard on most commercial DTP packages for many years – artistic text. This is a handy feature for headlines that assumes you want your text to fill the text box and resizes it automatically as you change the size of the box it’s in.
Body text
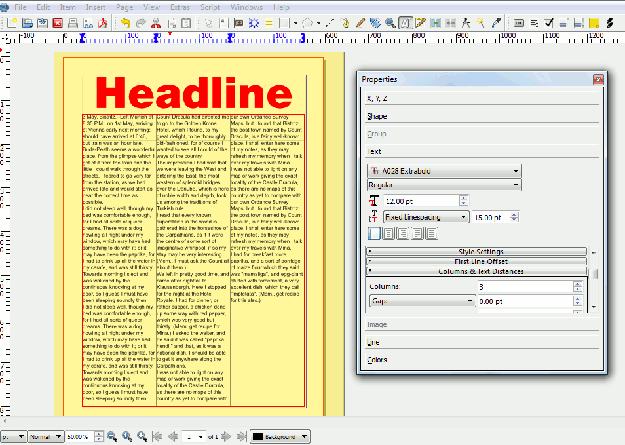
Add another text frame with the “Insert Text” button, and have it fill the page underneath the headline (leaving sensible margins at the side and bottom).
On the Properties window, click on the Text button and then under “Columns and Text Distances” change the number of columns to 3. Immediately under the Columns is Gap – it’s useful to insert a small gap between each column so the text doesn’t run across.
To see how this looks with real text, go to Insert > Sample Text from the drop-down menu and pick a few paragraphs in the language of your choice, just to fill it up.
As with the headline, you can change the font, size and other attributes of the body text for your article. If you were writing a newsletter, you might well have multiple body text frames, and Scribus can link them together so when text fills up one frame it automatically runs into the next one.
Adding graphics
From the buttons along the top, click on “Insert Image Frame” – next to the text frame button. Drag the frame to (roughly) the desired size, drawing it over the top of the text frame for now.
You don’t want your graphic to obscure the text so, with the image frame highlighted, go to the Properties window and click on the Shape button Under “Text Flow Around Frame” select “Use Frame Shape” and you should see the text immediately flow around the frame.
Now double-click inside the frame and select the graphic.
For some reason, Scribus assumes that what you really want is to place the graphic at full size and just have some random portion peeping out through the frame. I’ve no idea why this might be! Assuming you want to display the full picture, click on the Image button in the Properties window and select “Scale to frame size”. If you then select “Free scaling” it doesn’t put the image back the way it was, but it does allow you to easily crop your graphic by simply changing the size of the frame.
Unfortunately, there’s no quick button to rotate a frame by 90, 180 or 270 degrees as you would expect to find. If you need to rotate your graphic (or any other frame) you can do it freehand with the rotate button (roughly in the middle on the button bar at the top) or go to the XYZ section of the properties window and type in the degrees of rotation for the frame.
Under the Image button on Properties there’s also an Image Effects button. Under here you’ll find a number of effects you can apply, such as converting the picture to greyscale (useful if you’re printing in black-and-white and want to have more control about how the photo looks).
Conclusion
We’ve created a very simple leaflet, but the items covered (headline, body text, colored shapes and graphics) cover the majority of DTP projects.
Scribus is a functional tool – it’s been around for nearly a decade and there’s a good community to help with problems.
But compared to even the very basic end of the commercial DTP market, Scribus feels clunky, and makes you work much harder than you should to achieve very standard results. Where is the artistic text option that would make headlines a breeze, not a chore? Why do you have to search around in sub-menus to make a graphic fit the frame, crop it and rotate it?
If you don’t mind struggling against the software on a regular basis, Scribus will get the job done, but its commercial competitors still have a clear edge.


