Creating an SSL Certificate
When SSL is used with the Apache via the mod_ssl module, it will create an encrypted RSA file which has two components a private file which is kept secure on the server and a public file which is placed in the Certificate file and is thus used by users when they connect to the server. Users will be able to communicate securely then using the encryption that results in this kind of communication. New standards are requiring a 2048-bit key instead of the older 1024-bit key.
An official SSL Certificate is required in order to satisfy browsers and customers on a web site.
A Certificate Signing Request (CSR) must be created that contains the public key of the web site that will be installed in the certificate. This key identifies the owner of the web site and this is the information that you see when you view a certificate:
Country – State – Company – Organizational Unit – Domain – Email of Administrator
The CSR must be sent to a Certifying Authority (CA) who will then convert the certificate into a real Certificate which can be placed on the server with the signature of the signing authority. In this process the signing authority verifies the company is who they say they are on the certificate.
Process of Setting Up Certificate
OpenSSL should be installed on the server as this will be used to create the keys. Create a RSA private key for the server:
sudo openssl genrsa -des3 -out server.key 2048
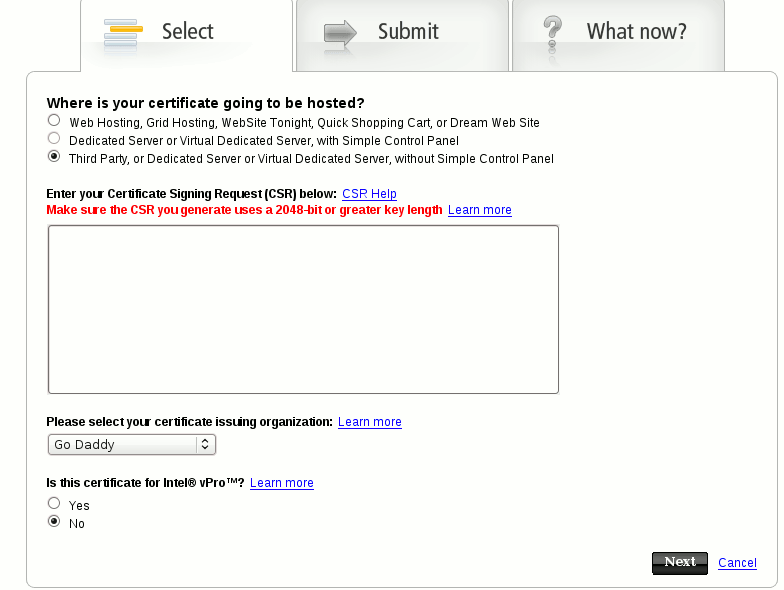
Now you must use 2048-bit encryption as the requirements are stronger now and will be completely in place by 2011. Here is an example of the requirement from GoDaddy.com, not that they are the standard but certainly very popular.
Enter pass phrase for server.key:
Verifying – Enter pass phrase for server.key:
It is important to create a backup of both the key and the password, or you may have to do the process all over again.
sudo openssl rsa -noout -text -in server.key
Enter pass phrase for server.key:
- – - cut – - -
Create a Certificate Signing Request with the server’s RSA private key
sudo openssl req -new -key server.key -out server.csr
Enter pass phrase for server.key:
You are about to be asked to enter information that will be incorporated into your certificate request.
What you are about to enter is what is called a Distinguished Name or a DN.
There are quite a few fields but you can leave some blank
For some fields there will be a default value,
If you enter ‘.’, the field will be left blank.
—–
Country Name (2 letter code) [GB]:US
State or Province Name (full name) [Berkshire]:Montana
Locality Name (eg, city) [Newbury]:Trout Creek
Organization Name (eg, company) [My Company Ltd]:My Company
Organizational Unit Name (eg, section) []:
Common Name (eg, your name or your server’s hostname) []:example.com
Email Address []:mike@example.com
Please enter the following ‘extra’ attributes
to be sent with your certificate request
A challenge password []:Mu75Rdes43
An optional company name []:
sudo openssl x509 -req -days 365 -in server.csr -signkey server.key -out server.crt
Send the request to a Certifying Authority.
Once the certificate is signed by the CA and returned to you the details may be viewed with this command:
sudo openssl x509 -noout -text -in server.crt
At this point there should be 5 total files that you have for SSL.
example.com.crt
gd_bundle.crt
server.crt (this is replaced by the domain name.crt from the CA)
server.csr
server.key
You will use three of those files, so copy them to the proper location.
SSLCertificateFile /etc/ssl/certs/example.com.crt
SSLCertificateKeyFile /etc/ssl/private/server.key
SSLCACertificateFile /etc/apache2/ssl.crt/gd_bundle.crt
Now modify your domain name in the /etc/apache2/sites-enabled. Make sure your SSLEngine is set to on.
<IfModule mod_ssl.c>
<VirtualHost 192.168.3.45:443>
ServerAdmin webmaster@example.com
ServerName example.com
ServerAlias www.example.com
DocumentRoot /var/www/example.com/
ErrorLog /var/log/apache2/error.log
CustomLog /var/log/apache2/ssl_access.log combined
SSLEngine on
SSLCertificateFile /etc/ssl/certs/example.com.crt
SSLCertificateKeyFile /etc/ssl/private/server.key
SSLCACertificateFile /etc/apache2/ssl.crt/gd_bundle.crt
</VirtualHost>
</IfModule>
Now restart apache and be ready to enter the SSL pass phrase you created. This pass phrase will be needed whenever you restart the server.

